PinpointのイベントをKinesis Data StreamからLambdaへ流す
概要
Amazon PinpointにはイベントをAmazon Kinesisに流す機能があります。 これを使って、JavaScriptクライアントで発生したイベントをLambdaで処理するアーキテクチャーを作ることができます。 JavaScriptクライアントは、AWS AmplifyのJavaScriptフレームワークを使って構築します。
- 概要
- 新規Angularプロジェクトを作成する
- AWS Amplify JavaScriptフレームワークを準備する
- Amplify CLIを使ってAWS上にユーザー認証基盤を構築する
- Amplify CLIを使ってAmazon Pinpointを構築する
- バックエンドの変更を適用する
- AngularアプリケーションでAmplifyが使えるように設定する
- Angularアプリケーションに、Pinpointへイベントを送信する機能を追加する
- Amazon Kinesis Data Streamを構築する
- Amazon PinpointからKinesis Data Streamにデータを流す
- Kinesisをトリガーにして起動するLambda関数を作成する
- Lambda関数のトリガーにKinesis Data Streamをセットする
- CloudWatch Logsを眺めながら、イベントを送信して検証する
- データの構造を確認する
- Pinpointから送られてきたBase64をデコードして形式を確認する
- まとめ
新規Angularプロジェクトを作成する
フロントエンドはAngularを使って構築します。
Angular CLIをインストールして、$ ng new で新規プロジェクトを構築します。
# Angular CLIをインストール
$ npm install -g @angular/cli

# Angularプロジェクトを新規作成
$ ng new PinpointKinesisLambda

# Angular Routingは使わない
? Would you like to add Angular routing? No

# スタイルシートはCSSで書く
? Which stylesheet format would you like to use? CSS

# ディレクトリ移動
$ cd PinpointKinesisLambda
AWS Amplify JavaScriptフレームワークを準備する
# Amplify CLIをインストール
$ npm install -g @aws-amplify/cli

# Amplify CLIを使って初期設定を行う
$ amplify init
Note: It is recommended to run this command from the root of your app directory

# プロジェクト名を指定
? Enter a name for the project PinpointKinesisLam

# 環境名を指定
? Enter a name for the environment pro

# エディタを指定
? Choose your default editor: Visual Studio Code

# 開発対象を指定(iOS or Android or JavbaScript)
? Choose the type of app that you're building javascript

Please tell us about your project

# JavaScriptフレームワークの種類を指定
? What javascript framework are you using angular

# ソースディレクトリを指定
? Source Directory Path:  src

# ビルド成果物のディレクトリを指定
? Distribution Directory Path: dist

# ビルドコマンドを指定
? Build Command:  npm run-script build

# ローカルサーバー開始コマンドを指定
? Start Command: ng serve
Using default provider  awscloudformation
For more information on AWS Profiles, see:
https://docs.aws.amazon.com/cli/latest/userguide/cli-multiple-profiles.html

# AWS CLIのプロファイルを使う
? Do you want to use an AWS profile? Yes

# AWS CLIのプロファイルを指定
? Please choose the profile you want to use <プロファイル名>
Amplify CLIを使ってAWS上にユーザー認証基盤を構築する
Amazon Pinpointに対してクライアントで発生したイベントを送信するには、必要な権限が付与されたAWSの認証情報が必要になります。 クライアントアプリケーションに対してAWSの認証情報を発行するには、Amazon Cognitoフェデレーテッドアイデンティティを使います。
Amazon Cognitoフェデレーテッドアイデンティティでは、認証されたクライアントと未認証のクライアントそれぞれに付与するIAMロールを指定することができます。 それぞれのロールに、Amazon Pinpointにイベントを送信するために必要な以下のポリシーを追加します。
- mobiletargeting:GetUserEndpoints
- mobiletargeting:UpdateEndpoint
- mobiletargeting:PutEvents
Amplify CLIを使うことで、このようなAWS上のリソースを意識することなくバックエンドを構築することができます。 もちろんIAMロールの生成や、適切なポリシーのアタッチも自動で行ってくれます。
# Amplify CLIで「Auth」機能を追加する
$ amplify add auth
Using service: Cognito, provided by: awscloudformation

 The current configured provider is Amazon Cognito.

# 既定の設定を利用する
 Do you want to use the default authentication and security configuration? Default configuration
 Warning: you will not be able to edit these selections.

# 認証に使う情報を指定
 How do you want users to be able to sign in? Username

# その他の設定はお任せ
 Do you want to configure advanced settings? No, I am done.
Amplify CLIを使ってAmazon Pinpointを構築する
Amazon PinpointもAmplify CLIで構築することができます。
# Amplify CLIで「Analytics」機能を追加する
$ amplify add analytics
Using service: Pinpoint, provided by: awscloudformation

# リソース名を指定
? Provide your pinpoint resource name: pinpointkinesislam
Adding analytics would add the Auth category to the project if not already added.

# 未認証でのアクセスを許可する
? Apps need authorization to send analytics events. Do you want to allow guests and unauthenticated users to send analytics events? (we
 recommend you allow this when getting started) Yes
バックエンドの変更を適用する
$ amplify push

Current Environment: pro

| Category  | Resource name              | Operation | Provider plugin   |
| --------- | -------------------------- | --------- | ----------------- |
| Auth      | pinpointkinesislam42083a71 | Create    | awscloudformation |
| Analytics | pinpointkinesislam         | Create    | awscloudformation |

# 変更を確認したら実行
? Are you sure you want to continue? Yes
これでCloudFormationが起動してバックエンドのリソースが構築される。
AngularアプリケーションでAmplifyが使えるように設定する
AngularアプリケーションでAmplify JavaScriptフレームワークを使うにはいくつか設定が必要です。 まず、必要なパッケージを追加します。
$ npm install aws-amplify aws-amplify-angular
次に、src/polyfills.tsに以下のコードを追記します。
(window as any).global = window;
(window as any).process = {
  env: { DEBUG: undefined },
};
続いて、src/tsconfig.app.jsonのcompilerOptionsに"types": ["node"]を指定します。
src/app/app.module.ts を以下のように変更します。
import { BrowserModule } from "@angular/platform-browser";
import { NgModule } from "@angular/core";

import { AppComponent } from "./app.component";

// この行を追加
import { AmplifyService } from "aws-amplify-angular";

@NgModule({
  declarations: [AppComponent],
  imports: [BrowserModule],
  providers: [AmplifyService], // providersにAmplifyServiceを追加
  bootstrap: [AppComponent]
})
export class AppModule {}
最後に、src/main.tsに以下のコードを追加してAmplifyを初期化します。
import Amplify from "aws-amplify";
import awsconfig from "./aws-exports";
Amplify.configure(awsconfig);
Angularアプリケーションに、Pinpointへイベントを送信する機能を追加する
src/app/app.component.html を以下のように変更します。
<button (click)="onButtonClicked()">イベント送信</button>
src/app/app.component.ts を以下のように変更します。
import { Component } from "@angular/core";
import { AmplifyService } from "aws-amplify-angular";

@Component({
  selector: "app-root",
  templateUrl: "./app.component.html",
  styleUrls: ["./app.component.css"]
})
export class AppComponent {
  constructor(private amplifyService: AmplifyService) {}

  onButtonClicked() {
    this.amplifyService.analytics().record({
      name: "MyEvent",
      attributes: {
        date: new Date().getTime().toString()
      }
    });
  }
}
これでJavaScriptクライアントの準備が整いました。
Amazon Kinesis Data Streamを構築する
今回、Amazon Pinpointはオレゴンリージョンに立ち上がりました。 Kinesis Data Streamも同じオレゴンリージョンにセットアップしないと、Pinpointのイベントを流すことができません。
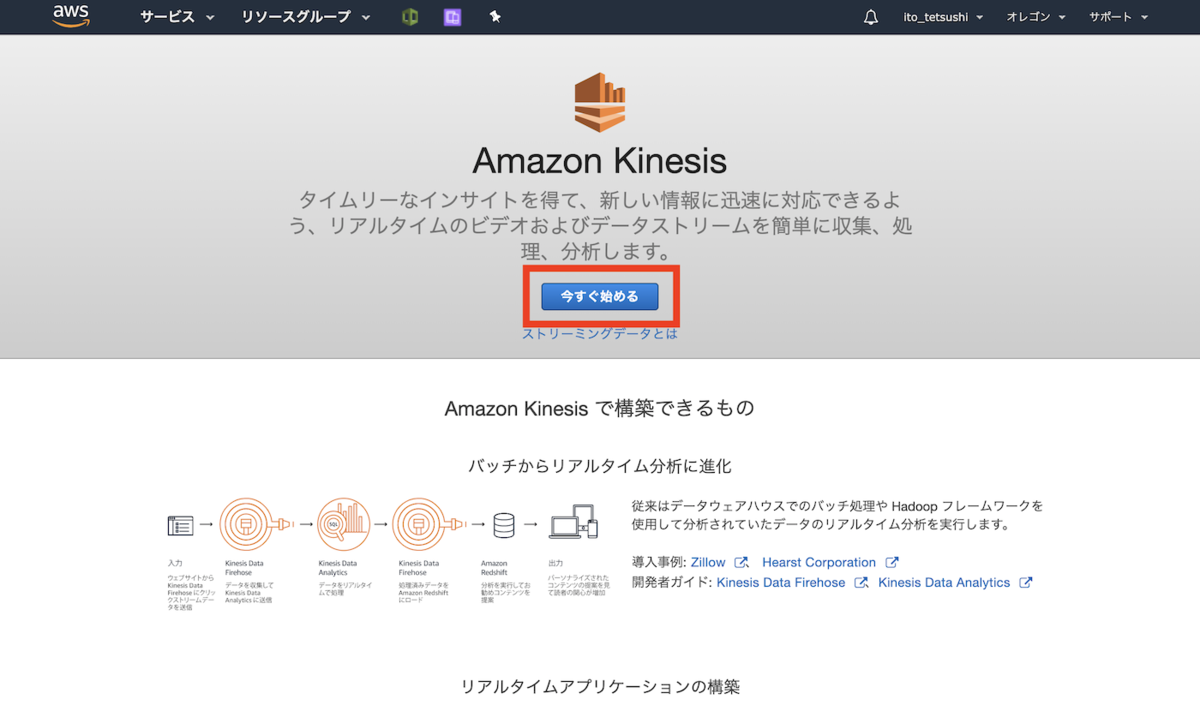
AWSのマネジメントコンソールにログインして、Kinesisの管理画面を開きます。
「今すぐ始める」をクリックします。

「データストリームの作成」をクリックします。

ストリーム名とシャード数を指定して、ストリームを作成します。


これでKinesis Data Streamは準備完了です。
Amazon PinpointからKinesis Data Streamにデータを流す
マネジメントコンソールにログインして、Amazon Pinpointの管理画面を開きます。 該当プロジェクトを選択して、メニューの「Settings」→「event stream」と進みます。 「Edit」をクリックします。

Kinesisの情報とIAMロール名を指定して設定を保存すれば完了です。

Kinesisをトリガーにして起動するLambda関数を作成する
マネジメントコンソールにログインして、AWS Lambdaの管理画面を開き、新しくLambda関数を作成します。 Lambda関数のランタイムはNode.JS 10.Xを選び、本体は以下のようなシンプルなコードにしました。
exports.handler = async (event) => {
    console.log(JSON.stringify(event));
};
また、AWS LambdaからKinesis Data Streamのストリームにアクセスするために、Lambda関数にアタッチされているIAMロールに以下の権限をアタッチします。
- kinesis:ListStreams
- kinesis:GetShardIterator
- kinesis:GetRecords
- kinesis:DescribeStream
Lambda関数のトリガーにKinesis Data Streamをセットする
Lambda関数の編集画面で、「トリガーを追加」をクリックします。

先ほど作成したKinesis Data Streamを指定します。

これで準備完了です。
CloudWatch Logsを眺めながら、イベントを送信して検証する
実際にLambda関数が動かないとCloudWatch Logsにログストリームもロググループも作られないので、Angularアプリケーションのイベント送信ボタンを何度か押してみます。
Pinpointに送信するイベントはAmplify JavaScriptフレームワークである程度バッファリングされているようです。 また、PinpointからKinesisへとデータが流れて、Lambda関数が実行されるまでも多少時間がかかります。
肌感覚ですが、だいたいイベントが発生してから2分ほどでLambda関数が実行されます。
しばらく待つと、CloudWatch Logsに以下のようにログが記録されていました。

データの構造を確認する
Kinesisから受け取ったデータは以下のような形をしています。
データはバッチ処理されるので、Recordsフィールドに配列で入っています。
実際にPinpointから送信されたデータは、kinesis.dataにBase64形式にエンコードされて格納されています。
{
  "Records": [
    {
      "kinesis": {
        "kinesisSchemaVersion": "1.0",
        "partitionKey": "-1667896638",
        "sequenceNumber": "49599259535682552348557865618060497301418154171654209538",
        "data": "<Base64形式のデータ>",
        "approximateArrivalTimestamp": 1567780307.056
      },
      "eventSource": "aws:kinesis",
      "eventVersion": "1.0",
      "eventID": "shardId-000000000000:49599259535682552348557865618060497301418154171654209538",
      "eventName": "aws:kinesis:record",
      "invokeIdentityArn": "arn:aws:iam::XXXXXXXX:role/service-role/PinpointKinesisLambda-20190906-role-m33cg6kb",
      "awsRegion": "us-west-2",
      "eventSourceARN": "arn:aws:kinesis:us-west-2:XXXXXXXX:stream/pinpointkinesislam-pro"
    }
  ]
}
Pinpointから送られてきたBase64をデコードして形式を確認する
kinesis.dataフィールドのBase64エンコードデータをデコードすると以下のようなJSONが格納されていることがわかります。
Amplify JavaScriptフレームワークを使うことでこれほど多くの情報が自動的に収集されています。
{
  "event_type": "_session.stop",
  "event_timestamp": 1567780272608,
  "arrival_timestamp": 1567780274582,
  "event_version": "3.1",
  "application": {
    "app_id": "7f79ec844d644e669ac818fecbc156dc",
    "cognito_identity_pool_id": "ap-northeast-1:4e815606-ddf2-4bc1-bbc5-74141b826dfc",
    "sdk": {},
    "version_name": "Chrome/76.0.3809.132"
  },
  "client": {
    "client_id": "c3cc0c40-d0ad-11e9-b963-3d4f07405ba8",
    "cognito_id": "ap-northeast-1:d473ddb6-e26b-4cfc-8caf-5f3c3790587a"
  },
  "device": {
    "make": "Gecko",
    "model": "Chrome",
    "platform": {
      "name": "macintel"
    }
  },
  "session": {
    "session_id": "f843cda1-d0b2-11e9-ad52-7fe1bc8d928d",
    "start_timestamp": 1567780269946,
    "stop_timestamp": 1567780272608
  },
  "attributes": {},
  "endpoint": {
    "EndpointStatus": "ACTIVE",
    "OptOut": "ALL",
    "RequestId": "d47ed32e-947a-417b-a679-592744f33466",
    "Location": {},
    "Demographic": {
      "Make": "Gecko",
      "Model": "Chrome",
      "ModelVersion": "76.0.3809.132",
      "AppVersion": "Chrome/76.0.3809.132",
      "Platform": "macintel"
    },
    "EffectiveDate": "2019-09-06T14:31:14.577Z",
    "Attributes": {},
    "Metrics": {},
    "User": {
      "UserId": "ap-northeast-1:d473ddb6-e26b-4cfc-8caf-5f3c3790587a"
    },
    "ApplicationId": "7f79ec844d644e669ac818fecbc156dc",
    "Id": "c3cc0c40-d0ad-11e9-b963-3d4f07405ba8",
    "CohortId": "77",
    "CreationDate": "2019-09-06T13:53:54.730Z"
  },
  "awsAccountId": "XXXXXXXXXXX"
}
まとめ
JavaScriptフロントエンドアプリケーション(今回はAngular)で発生したイベントを、Amplify JavaScriptフレームワークを使ってAmazon Pinpointに送信し、それをKinesis Data Streamを経由してAWS Lambdaを起動するアーキテクチャーを構築しました。
イベントを随時分析用のデータベースに流し込むようなアーキテクチャーはこれでいけるかと思います。
フロントエンドはAWS Amplfyで構築して、バックエンドはAWSのマネージドサービスを組み合わせて構築すれば、スケーラブルでセキュアなシステムがスピーディに構築することができそうです。